
How to Check Tire Tread Depth: Penny Test & Gauge
To check tire tread depth, use a tread depth gauge in the main grooves at several places across and around each tire. A U.S. penny gives a quick replacement warning: insert it with Lincoln’s head pointing down. If the top of his head is visible, arrange tire replacement.
Use a gauge when you need an actual number. Record the shallowest valid groove reading rather than an average that hides a worn area. At 2/32 inch, NHTSA says tires need replacement. A tire can also need replacement because of damage or age while it still has measurable tread.
Open the inspection checklistKnowing how to check tire tread depth helps you turn a vague “these tires look okay” judgment into a repeatable inspection. You do not need a workshop, a jack, or an expensive meter. You need safe access, good light, and a consistent method.
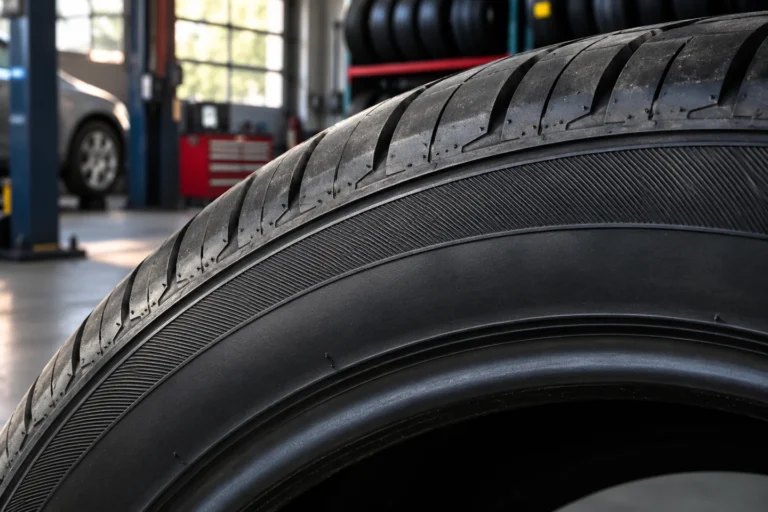
This guide covers passenger-car and light-truck tire checks for everyday drivers in the United States. It explains what a coin can tell you, where a gauge belongs, and why one good-looking groove cannot represent the entire tire. The photographs are illustrative tire details, not demonstrations of the measuring procedure.
Three ways to check tire tread depth
| Method | Useful for | Main limitation |
|---|---|---|
| U.S. penny | A quick warning near the replacement threshold | Does not give a numerical depth or prove overall tire condition |
| Mechanical or digital gauge | Recording depth and comparing inspection dates | Incorrect placement can produce misleading readings |
| Built-in wear bars | Spotting tread worn level with the indicators | Requires finding the actual indicator and checking multiple areas |
A gauge is the most useful purchase if you want a maintenance record. A simple mechanical probe is enough for occasional checks. A digital screen can be easier to read, but the display does not compensate for placing the probe on a stone or wear bar.
Choose a tool that clearly shows 32nds of an inch and, preferably, millimeters. Check its instructions, the measurement range, and whether a digital model needs zeroing before use. There is no need to buy a professional shop kit just to inspect one family car.
Prepare the vehicle before you measure
Park on firm, level ground away from moving traffic. Apply the parking brake, switch off the engine, and follow the vehicle’s parking instructions. Work somewhere you can crouch beside the tire without being exposed to passing vehicles.
Use a flashlight if the inner grooves are difficult to see. Remove loose surface debris only when it is safe to do so. Do not pull out an embedded nail, screw, or other object that may be sealing a puncture; have a tire professional inspect it.
You do not need to raise the vehicle for this check. If part of the tread is hidden by the ground, inspect the accessible area first. To expose another section, put tools away, move the vehicle safely, park and secure it again, then resume. Never reach around a moving tire or ask someone to roll the vehicle while your hands are beside it.
How to do the penny test
- Use a U.S. penny with Lincoln’s portrait visible.
- Insert the coin into a main tread groove with his head pointing into the groove.
- Look straight at the coin instead of judging from a steep angle.
- If you can see the top of his head, treat it as a replacement warning.
- Repeat at other accessible locations and on all four tires.
The coin is a screening tool. It does not tell you how many months the tire has left, whether a damaged sidewall is usable, or how the tire will behave in standing water. A tire that passes one penny check still needs a broader inspection.
If the result is borderline, do not keep changing the angle until the coin seems to pass. Measure with a gauge or ask a tire shop to check it. A small measuring tool is more useful than trying to decide whether a tiny part of a portrait is hidden.
Coins from other countries are different sizes and have different portraits. Do not apply the Lincoln-head rule to another coin. Likewise, a pressure gauge cannot measure tread: pressure and remaining rubber are separate checks.
How to measure with a tire tread depth gauge
1. Check the tool and its units
Make sure the probe moves freely and the base is clean. Follow the maker’s zeroing procedure for a digital gauge. Confirm whether the display is showing inches, millimeters, or 32nds. Writing “5” without a unit creates confusion when you compare notes later.
2. Put the probe in a main groove
Use a main tread groove, away from a raised wear indicator. Keep the probe clear of stones and other obstructions. Avoid using a shallow decorative cut or a narrow sipe as though it were a full-depth main groove.
3. Seat the base flat
Hold the gauge so its base rests evenly on the neighboring tread block surfaces. Extend the probe to the groove floor according to the instructions. A tilted base or a probe sitting on debris can change the result. Lift the tool and read the scale or screen.
4. Repeat across the tread
Check accessible main grooves toward the inner, middle, and outer portions of the tread. Repeat around the circumference once you can expose another section safely. Pay attention to the inner portion, which may be difficult to see from a standing position beside the car.
5. Record the lowest valid reading
Write down each tire’s position and the lowest reliable measurement. If three readings are 6/32, 5/32, and 3/32 inch, an average of roughly 5/32 conceals the shallow section. Recheck that spot and have uneven wear assessed rather than treating the average as a pass.
For a useful maintenance log, record date, odometer, tire position, groove readings, and any visible damage. The next inspection then has a reference point. Photographing your notes is often easier than trying to remember which tire had the lower number.
What your tread depth reading means
| Depth | Approximate millimeters | Practical next step |
|---|---|---|
| 8/32 inch | 6.4 mm | Record it and continue condition checks |
| 6/32 inch | 4.8 mm | Compare all tires and watch for uneven wear |
| 4/32 inch | 3.2 mm | Assess wet-weather needs and plan replacement |
| 3/32 inch | 2.4 mm | Arrange a prompt professional assessment and replacement planning |
| 2/32 inch or less | 1.6 mm or less | Replace the tire; do not extend use because other grooves are deeper |
The conversions are rounded. These numbers describe depth only; none is an overall safety rating. Road conditions, tire construction, damage, and manufacturer instructions still matter. Check local inspection requirements separately rather than treating this table as a legal standard for every jurisdiction.
Bridgestone’s consumer guidance highlights 4/32 inch as a point to begin replacement planning for wet conditions. Its advice explains why reaching the minimum replacement depth should not be your only planning trigger. Leave time to compare suitable tires before a rainy road trip.
For winter use, consult the specific tire manufacturer’s guidance and your expected route. The right replacement decision for regular snow and ice can differ from one for occasional dry local trips. Our snow tires vs studded tires guide explains the separate choice between winter tire types.

What if the inner edge is more worn?
Uneven readings are a reason to investigate. A worn inner section can be easy to overlook when the outer tread looks substantial. Measuring multiple grooves gives you a better chance of noticing the difference before it becomes an unexpected replacement problem.
Alignment, inflation, suspension condition, and other factors can affect wear. A pattern is a clue for a technician, not a diagnosis you can make from one number. Ask the shop to inspect the cause along with the tires, especially if the vehicle pulls, vibrates, or develops a new noise.
Keep pressure checks in the same routine using the vehicle’s recommended cold pressure. See how often to check tire pressure and our guide to tire pressure in cold weather. If one tire repeatedly loses air, use the slow tire leak guide to prepare for an inspection.
Rotation does not restore missing rubber. It may be part of the vehicle’s maintenance schedule, but rotating a tire with a dangerously worn section does not make that section acceptable. Ask about the cause before assuming a rotation is the complete remedy.
Good tread does not cancel damage or age
Look beyond the grooves. Bulges, exposed cords, cuts, separation, and other visible damage need professional attention. If you find a bulge or exposed cords, stop using the tire and arrange appropriate assistance. A deep groove elsewhere cannot offset structural damage.
Age is a separate part of the decision. Read the vehicle and tire makers’ replacement guidance, particularly for low-mileage cars, stored vehicles, and spares. Our DOT tire date code guide explains how to identify the manufacturing date; that date should be considered alongside condition and service history.
A tire with an old repair also needs assessment if a leak or damage develops. Measuring its tread cannot confirm whether the repair remains sound. If a tire has been driven flat or seriously underinflated, tell the technician, because its history may affect the inspection.
Monthly tire inspection checklist
- Park and secure the vehicle before inspecting.
- Check the pressure using the vehicle’s cold-pressure recommendation.
- Measure several main grooves on each tire.
- Record the lowest valid depth and its tire position.
- Look for wear bars, uneven wear, bulges, cuts, and embedded objects.
- Compare with your previous notes and arrange service for concerns.
Repeat before a long journey, especially if your regular mileage is low and you have not looked closely at the tires for a while. A monthly reminder is useful, but a new vibration, pressure loss, or impact is a reason to inspect sooner.
Do not predict a precise replacement date from two measurements taken a few weeks apart. Tool placement and rounding can be significant when the difference is small. Trends are helpful; they are not a guaranteed wear-rate calculation.

Frequently asked questions
Is the penny test enough?
It is useful for a quick warning near the replacement threshold. A gauge gives a numerical reading, and neither method replaces checking damage, age, pressure, and uneven wear.
Should I average tread depth readings?
Keep the individual readings and focus on the shallowest valid main-groove measurement. An average can hide a worn section that needs attention.
Can I measure over a wear bar?
Place the gauge away from the raised bar to measure the main groove. Separately check whether the tread surface is level with the wear indicators.
How often should I check tire tread?
Check monthly alongside tire pressure, before long journeys, and sooner after a new tire concern. Record results so you can compare successive inspections.
Does 4/32 inch mean my tires are illegal?
That reading alone does not establish legality. Requirements depend on jurisdiction and vehicle use. Treat it as a planning point for wet-weather performance and check applicable rules separately.
Sources and editorial approach
This is a research-based maintenance guide, not a hands-on gauge comparison or a tire performance test. We checked the following primary sources while preparing it. Product and vehicle instructions take priority for model-specific procedures.
- NHTSA TireWise: tread replacement threshold and monthly inspection guidance.
- Bridgestone: penny, quarter, gauge, and wear-indicator methods.
- Bridgestone Americas: pressure, damage, and tire age checks.

I write AutoTireSolutions guides to help drivers understand tire care, compare practical tools, and prepare better questions for a tire professional. This article draws on published safety guidance; I do not claim workshop testing for it.
About AutoTireSolutions
One Comment