
How to Clean, Store and Repair Snow Chains After the Season
Remove your snow chains according to the manual, rinse away salt and grit, and let the chains dry completely before they go back in the case. Inspect every cross chain, connector and tensioner while the set is laid out. If you find a broken or badly worn component, keep the set out of service until the manufacturer or its dealer confirms an approved repair or replacement.
A set can look ready through a clear case and still have a problem underneath. The parts that matter are often tucked under overlapping links, behind the tire during use, or inside the tensioning assembly. A short inspection after the last trip gives you time to order a part or replace the set while the vehicle can run without it.
This guide is for metal tire chains used on passenger vehicles. Cable systems, external-mount chains and textile snow socks have their own care instructions. Keep the chain maker’s manual handy for care and repair, and use the vehicle owner’s manual to verify chain clearance and which wheels can take them.
Jump to Cleaning · Inspection · Repair decision · Storage · FAQ
How to clean snow chains
Remove the chains in a safe parking area using the instructions for your model. At home, set up a spot where you can lay out both chains without walking over them. Have water, a cloth and a place to dry the chains ready. Keep track of removable accessories, such as separate tensioners or adapters, before moving the set out of its case.
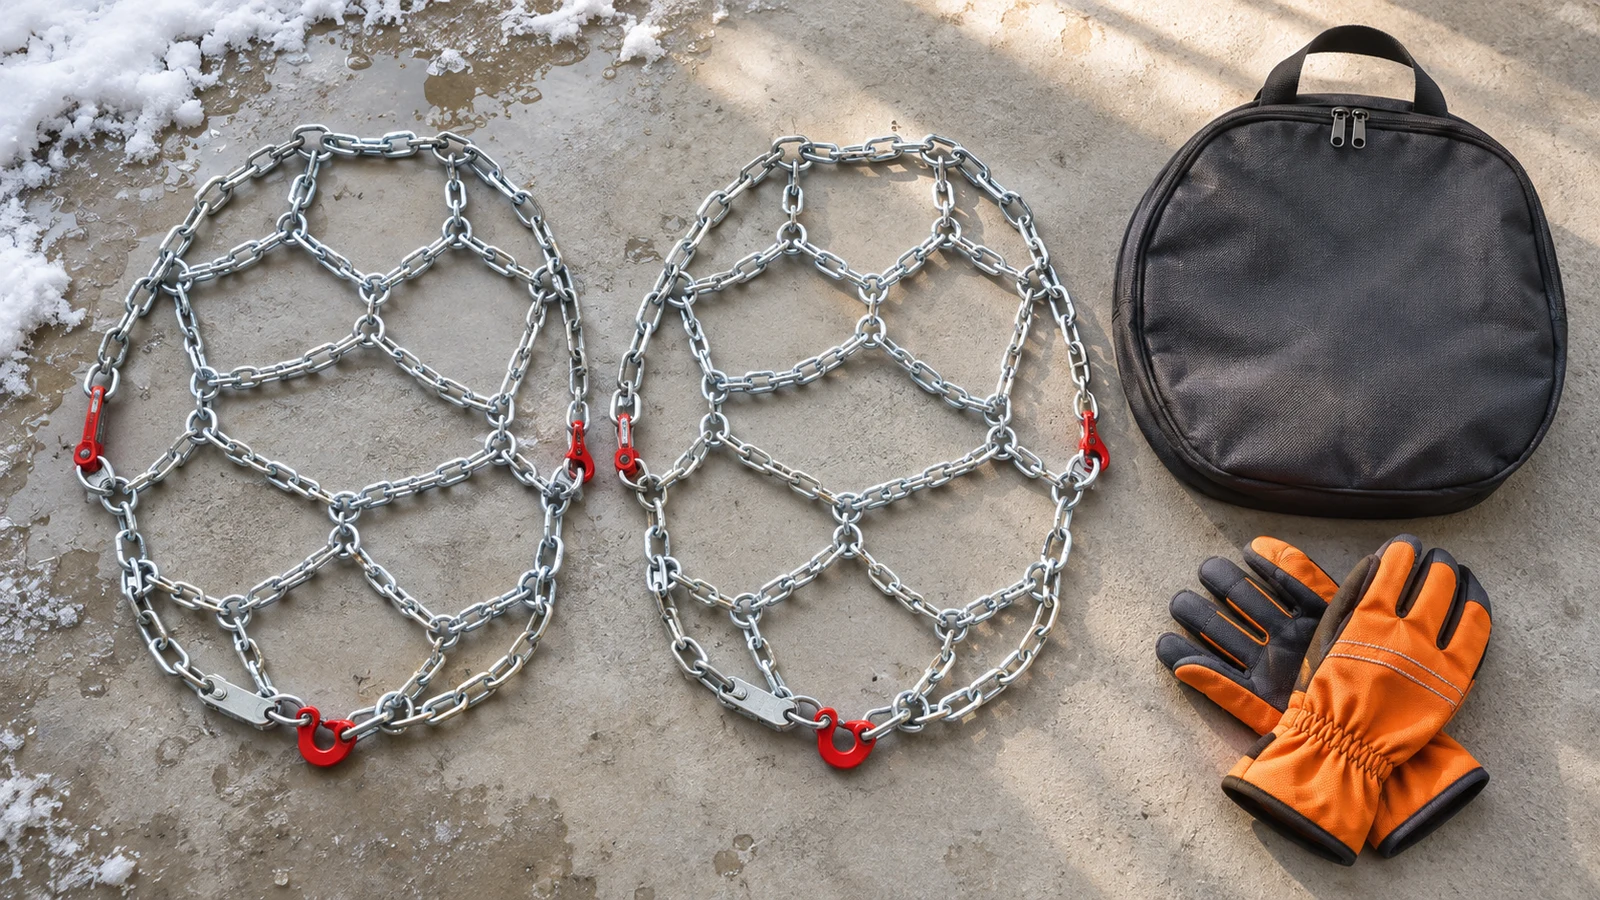
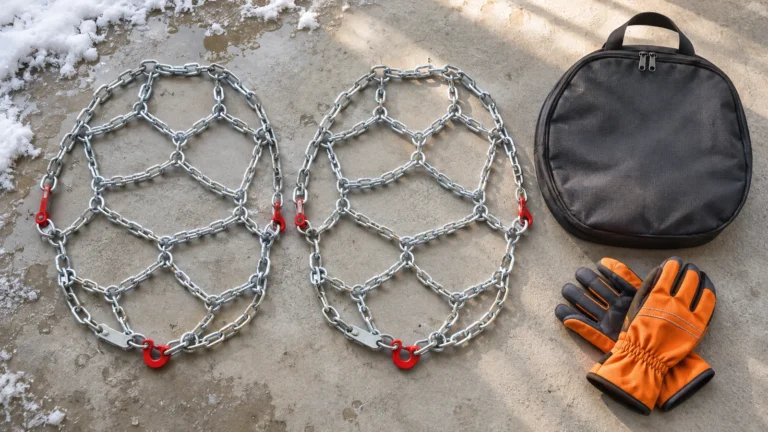
Spread one chain out with the cross-chain section exposed and the fasteners visible. Open or separate the matching chain beside it if the manufacturer’s instructions allow. Having both in view makes it easier to spot a missing component and gives you a reference when a connector’s shape looks unfamiliar. Some sets have different markings or hardware positions on each side, so compare against the diagram for the model as well.
Rinse the chains using the method in your manual. For example, König’s chain maintenance instructions call for lukewarm water after use to clear dirt and chemical residue. Work through the contact surfaces where links overlap and along the parts near the closures. If grit remains at a mechanism or you are considering a cleaner, consult the guide for that specific model before adding detergent, solvent or lubricant.
Rinse and dry the case separately if it has collected slush or grit. Check the edges, seams and bottom of the tray. These spots can hold water after the outside looks dry. Put any printed instructions somewhere dry while you work, then return them to the case once it is ready.
Blot visible water with a cloth and leave the chains spread out until completely dry. Turn links or shift the assembly so moisture can escape from both sides and from the overlap points. The drying time depends on the room, airflow and how much water is trapped. Before packing, wipe the underside of the connectors and check for new moisture on the cloth. If you still find droplets, leave the chains out longer.
What to check before storing snow chains
Start at one end of each chain and work around it in the same order every time. Inspect the pieces that cross the tread, then the sections that run along the sides, then the fasteners and tensioning hardware. Look for obvious differences between links that are supposed to have the same shape. A flashlight helps when you are looking at overlapping parts or dark marks on a connector.
Pay particular attention to the sections that touch the road. Look for a cracked, open or missing link, a flattened wear spot, or a cross chain that sits crooked when the assembly is spread out. Surface discoloration alone tells you little about remaining material. If rust obscures the shape of a link, you see pitting, or you cannot judge the remaining thickness, set the chains aside and ask the manufacturer or a qualified dealer for an assessment. Follow the model’s own wear limits.
Next, find the inside closure and the outside closure. Look at the spots where each connector meets the next piece. Check the tensioner or adjustment hardware as directed by the manual, without taking apart a sealed mechanism. If your system has removable rubber tensioners, inspect them for splits or other deterioration. If it uses an external adapter, check the parts listed in the fitment instructions before closing the case.
Use the checklist below after cleaning. A clear photo of the whole chain and a close-up of the questionable component can help a dealer identify what you are seeing. Include the model and size label in a separate photo so the dealer can match the part to the exact set.
| What you find | What to do |
|---|---|
| Salt or grit, with no apparent damage | Rinse as directed, dry completely and inspect again before packing. |
| Rust obscures a link, or a link looks thinned or pitted | Keep the set out of service and check the manufacturer’s wear criteria or ask a dealer. |
| Cracked, open, missing or deformed link | Keep the set out of service. Ask whether the model has an approved repair. |
| Hook or tensioner fails to operate as instructed | Check the model’s parts list and repair policy before using the set again. |
| Chain was stored wet | Unpack it, clean and dry both case and chains, and check for corrosion and sticking components. |
| Vehicle or tire size has changed | Recheck vehicle clearance and the chain maker’s size chart before fitting the set. |
If the chain broke during use or struck the wheel well, treat that as a separate issue from routine cleaning. Keep the device out of service. If you suspect damage to the tire or vehicle, have it inspected before relying on the vehicle for another winter trip. Record which wheel was affected and what you heard or felt. A chain inspection alone cannot tell you what happened behind the wheel.
Can you repair snow chains?
Sometimes a manufacturer offers replacement parts for an exact model. For example, König’s K-Summit parts sheet lists repair links for that series. The existence of a spare part does not establish that it fits a different chain, that a cracked closure can be repaired the same way, or that a repair will return a worn set to service. Check the model number, the manufacturer’s repair instructions, and the condition of the rest of the assembly.
When to ask about a model-approved part
If you find one localized problem and the rest of the chain appears sound, take a photo and look for the part diagram for your exact model. Ask the manufacturer or dealer whether that failure is repairable and whether the work needs to be done by a service professional. Ask if the repair is intended for normal service or has specific limitations. If the manual describes a temporary repair, follow its restrictions and have the set assessed before its next planned use.
Compare the cost and availability of the approved part with a compatible replacement set. The ability to order a part is useful when you have enough time to fit it and verify the result according to the manufacturer’s instructions. A deadline for a trip can make replacement the practical option. Either way, set aside the damaged chains until the question is resolved so they cannot be grabbed by mistake.
When replacement makes more sense
Replacement is the practical choice when several sections are worn, damage extends across several components, the chain maker cannot identify the set, or the maker provides no approved repair for the damage. Get a fitment check before ordering. Chains that came off the previous vehicle are only candidates for the current one once the manufacturer’s size guide and the owner’s manual both support that fit.
Avoid substituting hardware-store links, wire, zip ties or a repair part from another system. A piece that closes around a chain on the workbench can still have different dimensions and clearance under load. An approved part is only one part of the decision. The complete assembly, including any undamaged-looking components, needs to meet the manufacturer’s criteria before it goes back into use.
Need a compatible replacement? Compare chain types, fit and wheel-well clearance. Once you know which type the vehicle permits, use the snow chain roundup for cars and SUVs to narrow your shortlist.
How to store snow chains
Use the original case or the storage container your instructions recommend. Pack each chain in the position shown in the manual if one is specified. Keep both sets of hardware together but separated enough that one chain cannot pull itself into a knot with the other. A diagram or a photo of the dry, laid-out set can help you recognize the correct orientation later.
Put the chain model, supported tire size and any required accessories on a card in the case. Write down the actual size on your car’s tire sidewall as a reference and recheck it if you change wheel or tire packages. Save the model manual on your phone or keep a printed copy with the set. Include the adapters or tensioners the kit calls for and mark any missing piece on the outside so the case is clearly identified as incomplete.
Choose a dry place where the case can sit flat and will stay accessible. If you keep chains in the vehicle during part of the year, secure the case according to the vehicle’s cargo guidance. After a trip, unpack wet gear promptly instead of letting it stay zipped up in the cargo area. For off-season storage, check that the case itself is dry before you put it away.
A simple label can save a roadside mistake. Write “inspected and dry” with the date once the set has passed your checks. Mark a questionable kit “do not use” and keep it separate from serviceable equipment. If you sell the vehicle or switch tire sizes, leave the compatibility label with the old set so you can identify it later.
Check the fit before the next winter trip

Open the box as soon as snow is in the forecast for your route. Confirm you have both chains and any removable hardware. Verify the exact tire size and the vehicle’s approved axle and clearance requirements against the relevant instructions. If you purchased a different chain or changed your tires, take time to read the fitting guide again.
When the set has passed inspection and the manuals allow the fit, practice installing and removing it while parked in a safe spot. Our snow chain installation guide walks through the checks to make during that practice. If there is any doubt about the set’s condition, get the fit and condition assessed before driving with it. Before departure, use the chain requirements guide to find the authorities to check along your route.
Snow chain maintenance FAQ
Can I put snow chains away damp if I’m using them again next week?
Unpack them and dry them after use. A closed case can hold moisture against the links and connectors. Dry the case and the set separately, then put them back together after both are dry.
Is rust a reason to replace a snow chain?
Look at the location and depth of the corrosion, the amount of material left, and the manufacturer’s criteria. If rust prevents inspection or you can see pitting or a change in link shape, keep the set out of service while you get it assessed.
Can I spray snow chains with oil before storage?
Use a lubricant or protective product only if the manual calls for it and specifies where to apply it. The care instructions can differ for bare links, coated cables, plastic components and tensioners.
Can I fix one broken link and keep using the set?
Check whether the manufacturer approves a repair for the exact model and component. Some kits have service parts and some repairs carry restrictions. Use the manufacturer’s repair decision and have any additional damage assessed before using the chain again.
How can I tell if my old chains fit a new set of winter tires?
Match the full size printed on the tire sidewall to the chain maker’s current fitment chart, then check the vehicle owner’s manual for axle and clearance rules. A match on wheel diameter alone leaves out the tire width and sidewall dimensions.


One Comment