

How to Install Snow Chains Step by Step (Practice Before You Need Them)
As an Amazon Associate I earn from qualifying purchases. We may also earn a commission through Walmart links.
To install snow chains, park in a designated chain-up area or another safe, level place off the roadway. Confirm the installation axle in your vehicle’s manual, then fit each device according to the instructions for its exact model. Before continuing, check that the chains are centered and secure. Follow the maker’s instructions for any short roll, recheck or retensioning step.
The steps below show what to check in order. Keep the instructions that came with your kit handy for the actual fastener sequence. A self-tightening chain, a conventional ladder chain and a traction cable can each connect and tighten differently.
Before you leave home
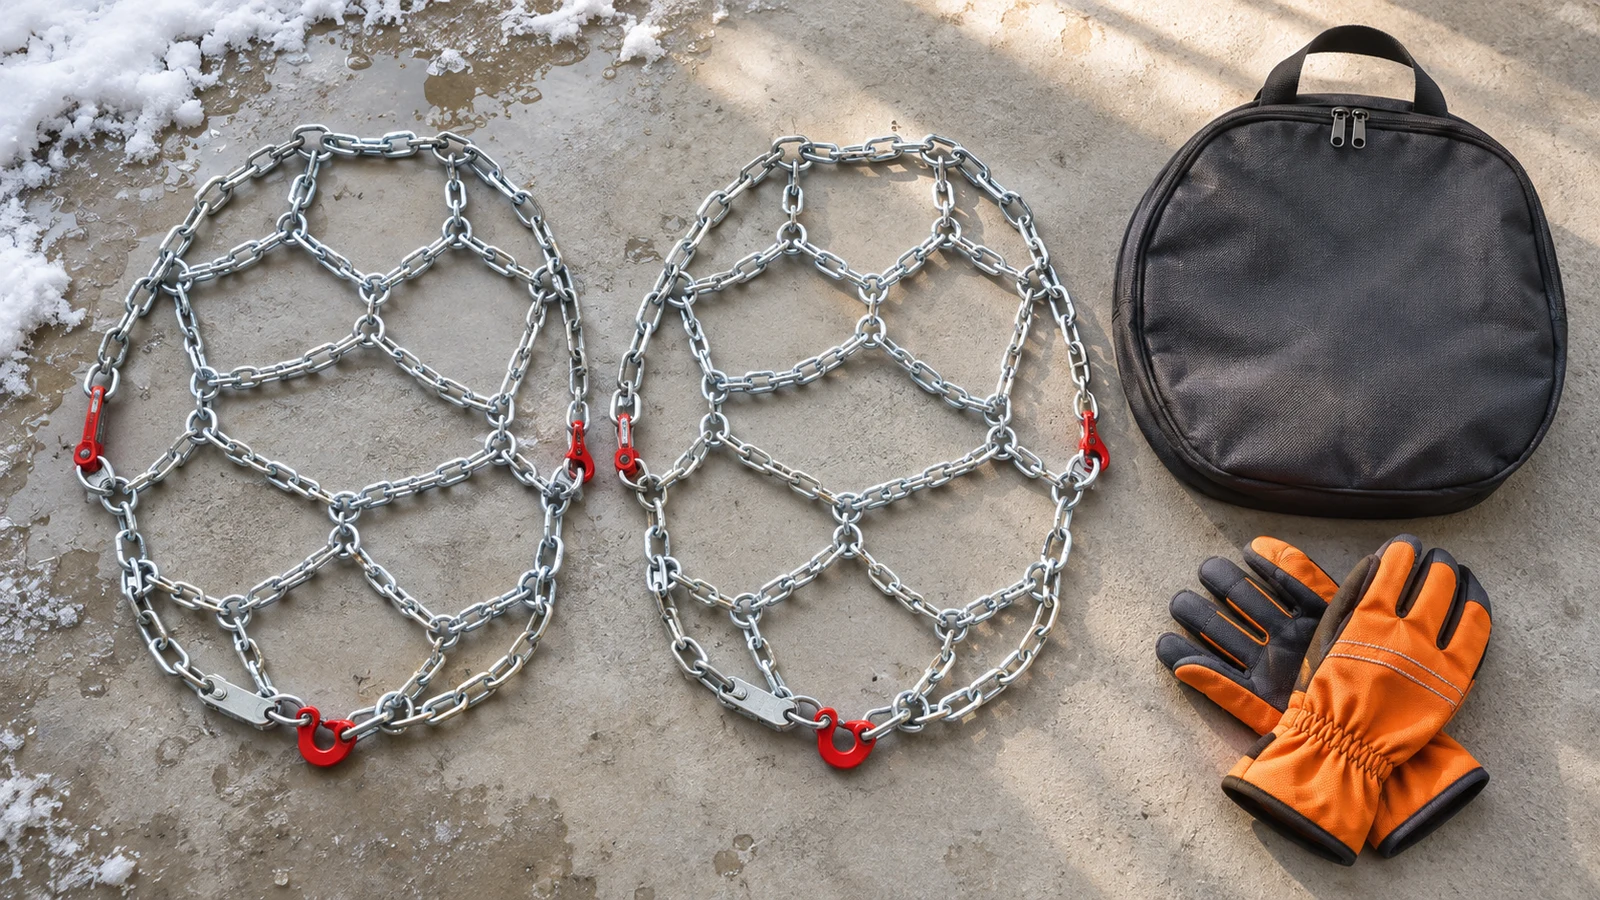
Practice in a level driveway or another safe, off-road place with good lighting. Take the whole kit out of its bag and set the two devices side by side. Find the printed instructions, check any labels that identify the inner and outer sides, and locate the tensioners supplied or specified by the manufacturer. Check for worn, distorted or broken parts. If anything is damaged or missing, resolve it before counting on the kit in snow.
Read the restrictions for your specific model year and wheel setup. Write down the permitted axle, tire size, device type and clearance limit. Then read the tire markings on that axle. If you changed wheels or tires since buying the chains, check the manual and the device fit chart again. Our snow-chain sizing guide explains how to match a mounted tire to a part number.
Try fitting and removing both devices with the gloves you plan to take. That practice shows which clips you can reach, how to recognize the inside connector and where to keep the instructions. Use your first dry run to discover a fit problem, rather than finding it on a dark roadside. Pack the instructions with the kit or save a copy on your phone for offline use.
How to install snow chains step by step
1. Park safely and confirm the axle
Use a designated chain installation area where available and pull fully out of moving traffic. Follow the instructions of road crews and any posted signs. Secure the vehicle according to its manual, including setting the parking brake and shutting off the engine while fitting. If your model’s instructions require you to move the vehicle during the job, first make sure everyone and all loose equipment are clear, then secure it again before you return to a wheel.
Identify the axle before you unpack both chains. Use the placement specified in the vehicle manual. The drivetrain badge alone does not tell you where the vehicle maker allows chains. Read any exceptions for wheels that differ across trim levels. If the permitted setup cannot be confirmed, pause the trip or obtain the correct guidance before trying to improvise.
2. Lay out and orient the chain
Set one unit flat next to the first tire. Untwist the cross-members and locate the inner connector, outer closure and any adjuster. Use the manufacturer’s illustration to identify which side contacts the tire. A twisted segment can change how the chain sits and can make it harder to see whether a connector has closed. If a component looks different from the instructions, compare the model number and check for damage before fitting.
Keep the second unit away from the wheel until you need it. Put the storage case and extra hardware where you can reach them without stepping into traffic. In low light, use a headlamp or another light that lets you read labels and inspect fasteners with both hands free. Copies of the exact instructions are more useful than a generic installation video for a different kit.
3. Connect in the order your model specifies
Follow the sequence in the manual. On some devices you pass an assembly behind the tire and join the inner ends first. Other kits require a different positioning step. The Peerless Auto-Trac installation booklet shows the sequence for that product specifically. Use it when your kit is an Auto-Trac and use the matching instructions for other models.
Once the inner and outer connections are made as directed, check that the cross-members sit across the tread in the positions shown by the maker. Repeat the procedure on the other tire on the authorized axle. If the connectors will not reach or the assembly looks skewed, reopen the setup and check for twists, incorrect orientation or the wrong part number. Forcing it closed can hide a fit problem.
4. Set tension and inspect both wheels
Engage the kit’s adjuster or tensioner the way the manual shows. Some kits use built-in tensioning and others specify separate hardware. Use the hardware approved for your model. Check that latches are fully engaged and loose ends are secured where directed. Compare both wheels before you drive. A discrepancy in how the cross-members sit can be a sign that one side needs to be refitted.
Perform any settling roll or recheck required for that kit in a safe area as instructed. Park securely again before getting out. If your device shifts, strikes a component, or has a connection that will not stay closed, stop using it and resolve the fit or hardware problem. If you hear contact while moving, pull over safely before inspecting.
5. Drive within the applicable limits
Read the maximum speed in the device manual and follow the posted limit and directions where you are driving. Use the lower applicable limit and adjust further for conditions. Stay alert for a new repetitive strike or vibration. A fitting check at the turnout does not replace the manufacturer’s instructions about inspecting the device after it has settled or after operating conditions change.
If a road authority sets a chain-control zone, follow the posted signs and the crew’s directions. Check the current rules for your route before traveling. Drivers in California can consult the Caltrans chain controls and installation guidance, including where to fit and remove chains along a controlled route.
What to check when a snow chain will not fit
| What you notice | What to check next |
|---|---|
| Inner ends cannot connect | Compare the tire marking and model number, check for twists, then confirm the installation orientation. |
| Cross-members sit along one edge | Check the centering and fastening sequence in the device instructions before you continue. |
| Tensioner will not engage | Check for missing or mismatched parts and follow the kit-specific instructions. |
| Repeated striking or unusual vibration | Pull over safely, secure the vehicle and inspect for movement, damage or contact. |
If you need to identify what went wrong, start with the part number on the case and the complete size on the tire. A match on wheel diameter is insufficient. If the chain appears to fit one side but not the other, inspect both tire markings and compare the two devices for twists or wear. Follow the manufacturer’s support or replacement guidance if you suspect a defective part.
For a clearance conflict, revisit the owner’s manual and the fit chart before choosing another style. The manual can specify a permitted cable or other device for one tire configuration and different requirements for another. Our cable, diamond and ladder chain comparison explains the differences between the construction and layout of these devices.
How to remove and pack snow chains
Follow the applicable road instructions. Locate a safe pull-off where removal is allowed. Secure the vehicle, then release the tensioning mechanism and connectors in the model-specific order. Some devices require repositioning the vehicle before you can retrieve them. Follow the instructions for that step and keep people and loose equipment clear whenever the vehicle moves.
Collect both devices and all loose hardware before you leave. Back at home, follow the maker’s cleaning directions and dry the kit before storing it. Inspect the fasteners and cross-members when you can see them clearly. Record the tire size and part number together so you can confirm fit before the next season. If a part needs replacing, check what the device maker specifies for that model.
What to keep in your chain bag
- The approved pair and the tensioning equipment specified for it.
- The instructions for the exact model, accessible offline.
- Work gloves and a light that leaves your hands free.
- The tire size and model number you verified during practice.
If you still need a device, start with the approved construction and match the exact tire size before comparing price. The snow chains for cars and SUVs roundup gives you options to compare after verifying fit. A replacement kit is easier to assess when the seller shows both the exact SKU and what is included in its box.
A final check at the turnout
Before leaving the installation area, account for all tools and packaging, then inspect the inside and outside connections on both wheels from a safe position. If you are traveling with someone, have them read the model-specific checklist while you inspect the fit. Note where the next safe pull-off is in case you need to stop. If one wheel needs adjustment after the first inspection, compare the other wheel against the same instructions. Keep the kit’s instructions accessible until you have removed both devices and packed them away.
Frequently asked questions
Do I put snow chains on the front or rear?
Use the axle specified in the owner’s manual for your exact vehicle and tire configuration. An AWD or 4WD label is insufficient to determine placement. Check for exceptions by wheel size or trim. If the manual permits only a particular device type, choose a product that meets that requirement as well as the tire-size and clearance limits.
Should I retighten chains after installing them?
Follow the instructions for your model. A conventional chain and a self-tightening model can call for different checks. If the instructions call for a short settling roll, do it as directed in a safe place and secure the vehicle again before inspecting the chains. Address noise, shifting or an insecure connection before continuing.
Can I practice with chains on a dry driveway?
You can use a safe, level spot for a stationary practice fit and removal when the model instructions allow it. Follow the manufacturer’s directions for any required vehicle movement. That rehearsal is a chance to learn fastener order, check clearances and confirm that the kit fits before you encounter a roadside chain-up area.
How do I know if I have the right size?
Match the full code on the mounted tire to the fit chart for your exact device model. Confirm the resulting part number against the box, then verify vehicle clearance and axle limits. A pre-fit test according to the maker’s instructions helps identify issues that a listing or size chart alone cannot reveal.